So, so fun. One of my favorite movies sparked so many ideas for delightful party details.
I am planning to create another The Goonies themed party later this year, and I am looking forward to using some of these techniques and crafting some things I wasn't able to do last time.
The invitations: I chose a heavy textured paper, folded it in half and cut it in two. I had some thin foam sheets, which I cut into strips the same width as the red ribbon I purchased. I cut out and glued a little piece of paper colored silver to finish off the "suspenders" and give some fun dimension to the front of the invitations.
The Superman logo and famous "Hey you guys!" quote in a Goonies font finished off the look.
For the back of the invitation I printed out the treasure map. For some reason I only have a picture of the prototype and not the completed invitation, which is such a shame. This is fun, but it looked AMAZING when it was finished.
The actual completed invitations had a map which I crumpled up to give it a weathered look, then folded so the seal on the outer edges met in the middle. I then burned the edges with a candle.
Quick tip: I found it best to keep two sets of damp paper towels nearby. I held the map over the flame of the candle, and then quickly set it down on the damp paper towel and pressed it with the other damp paper towels. This immediately extinguished any ember and helped me control where the browning occurred.
I also cut out and burned the edges of the white sections, which are holes in the map.
I glued the map onto the invitation, but only in the center, so the map was still raised off the paper. The result was a fantastic miniature pirate treasure map.
I actually managed to meet the star of The Goonies, Sean Astin, only a few weeks before the party. I gave him one of the invitations to the party, which you can see here in front of him. (He loved the invitation and said it was amazing and autographed an extra invitation for me to keep. Be still my heart.)
I saw a small tin bucket at the party supply store and knew I needed to make a tiny version of "Troy's bucket", which only took a few supplies and about an hour.
I painted the bucket brown and then patted it with a dry sponge brush while the paint was still wet to give it an older appearance.
I grabbed a piece of yellow felt from my stash of colors and quickly sketched out a letterman jacket. I hand stitched it because I'm ridiculous, but using a sewing machine would make quick work of this tiny craft.
I sketched out and cut out a tiny A and some stripes for the arm of the jacket out of blue felt and stitched them on. (After this photo was taken I used a thin marker to write Troy in cursive on it.)
My favorite project BY FAR for this party was the cave tunnel which formed the entrance into the party area. Because what is a Goonies party without a cave??
I enlisted the help of a couple of friends, nieces and nephews. We went through a few attempts with figuring out how to make this thing work. Failure is such a great learning tool.
How it finally came about:
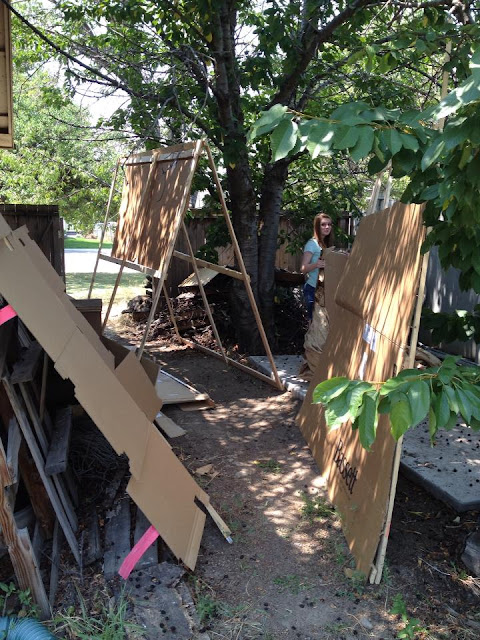
I nailed together some long boards into 8' squares. I added boards across for stability. We propped them up into an A-frame, and bound them together. (We tried many things, and the one that worked best for us was good ol' tried-and-true duct tape.)
When the frames were finally standing and ready for the next step, we used a staple gun to attach cardboard to the outside of the frames. (Started with putting the cardboard on the inside, but gravity was not our friend. It worked a lot better on the outside.)
I then used several several several yards of brown butcher paper to create our faux rock. After unrolling a large portion of the paper, we crumpled it up as much as we could (stepped on it, sat on it, whatever it took to help get it crumpled up.) After smoothing it back out about 80%, we gathered it loosely in panels across the wood and cardboard and used the staple gun to hold it in place.
I left a small gap in the top at one section and secured Troy's bucket on a string. This tiny detail made me ridiculously entertained.
A 4' long plastic pirate ship sandbox was washed out and filled to the brim with ice, drinks, necklaces, jewels, swords, pirate gold doubloons and a Jolly Roger flag.
Such a fun party theme! I look forward to brainstorming and trying out new crafts for our The Goonies party later this year.


Comments
Post a Comment